Size the route
Confirm appliance demand, gas family, equivalent length and pressure drop before selecting DN15-DN50.
 Request a sample
Installation
Flexigas gas pipe installation still starts with design, sizing, route planning, support, protection, bonding, tightness testing and Gas Safe competence. Once the route and pipe size are checked, Flexigas CSST fittings assemble with a wheel cutter, a utility knife and two spanners, with no soldering or crimping tools.
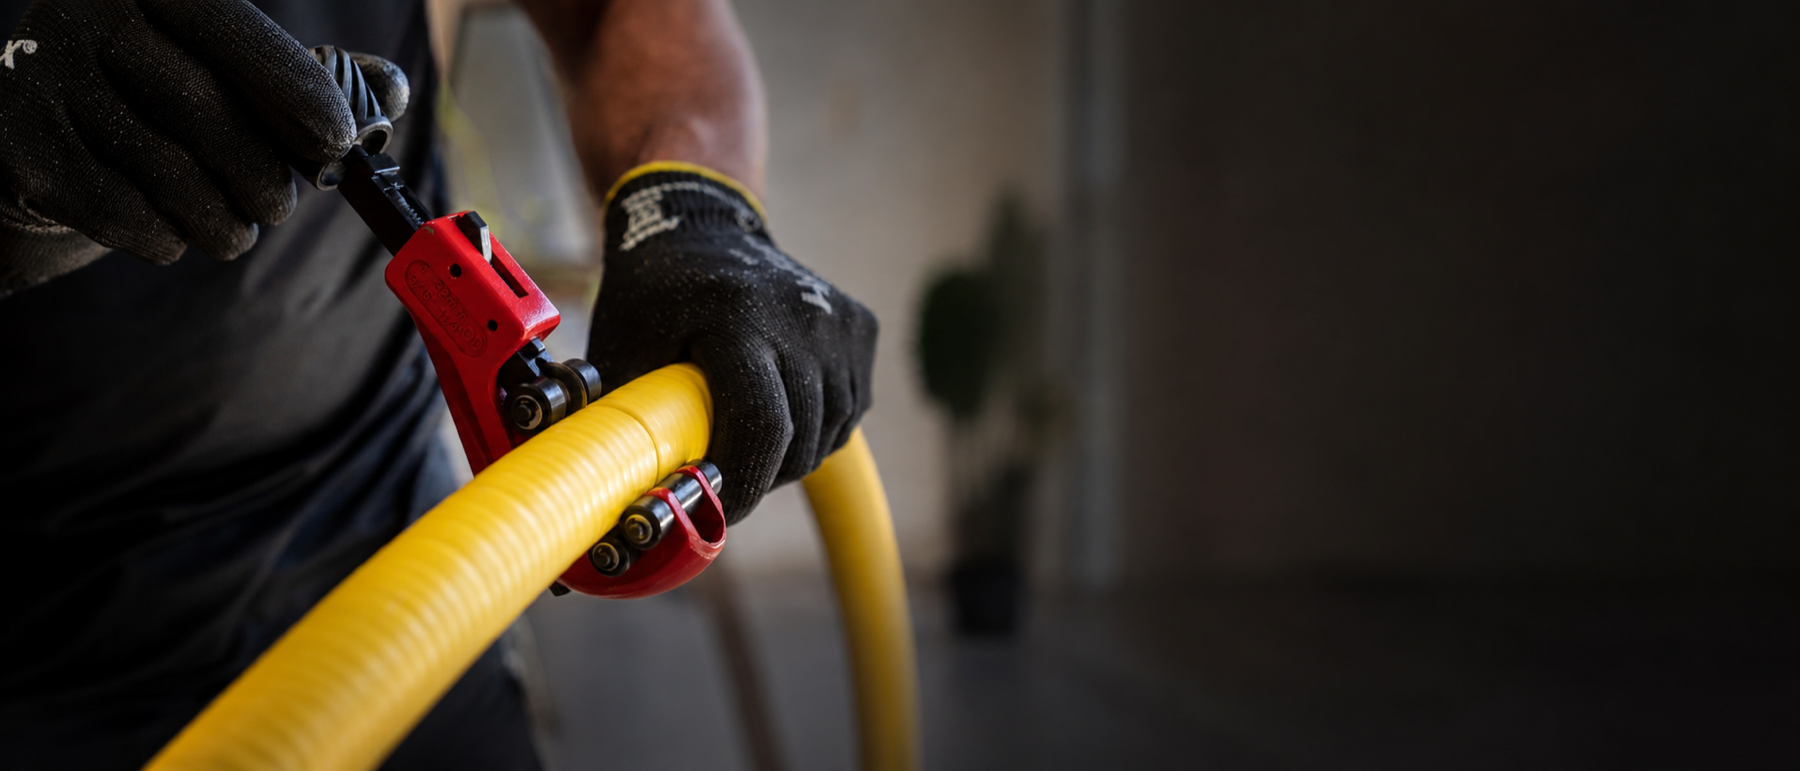
Gas pipe installation
For a UK gas pipe installation, check the route, connected load, pipe size, pressure drop, support spacing, protection through walls and floors, bonding, tightness testing and installer competence before choosing materials or fittings. Flexigas can help with CSST-specific sizing, documents and technical support, but the installation must be designed and carried out by a competent Gas Safe registered engineer.
Confirm appliance demand, gas family, equivalent length and pressure drop before selecting DN15-DN50.
Check joists, walls, solid floors, buried sections, sleeves, protection, access to fittings and support positions.
Follow the current Flexigas installation manual, data sheets, Kitemark and BS EN 15266 context.
For DN40/DN50, commercial, void, tight pressure-drop or unusual routes, speak to technical support before specifying.
Need a practical comparison before choosing a material? Read gas pipe installation methods or compare Flexigas CSST with copper gas pipework. For hands-on support, request Flexigas training.
The connection
The corrugated tube self-flares against the brass seat to make a dry, metal-to-metal seal. No jointing compound, no PTFE. The same seven core assembly steps apply to Flexigas fittings, after the route, size and installation conditions have been checked.
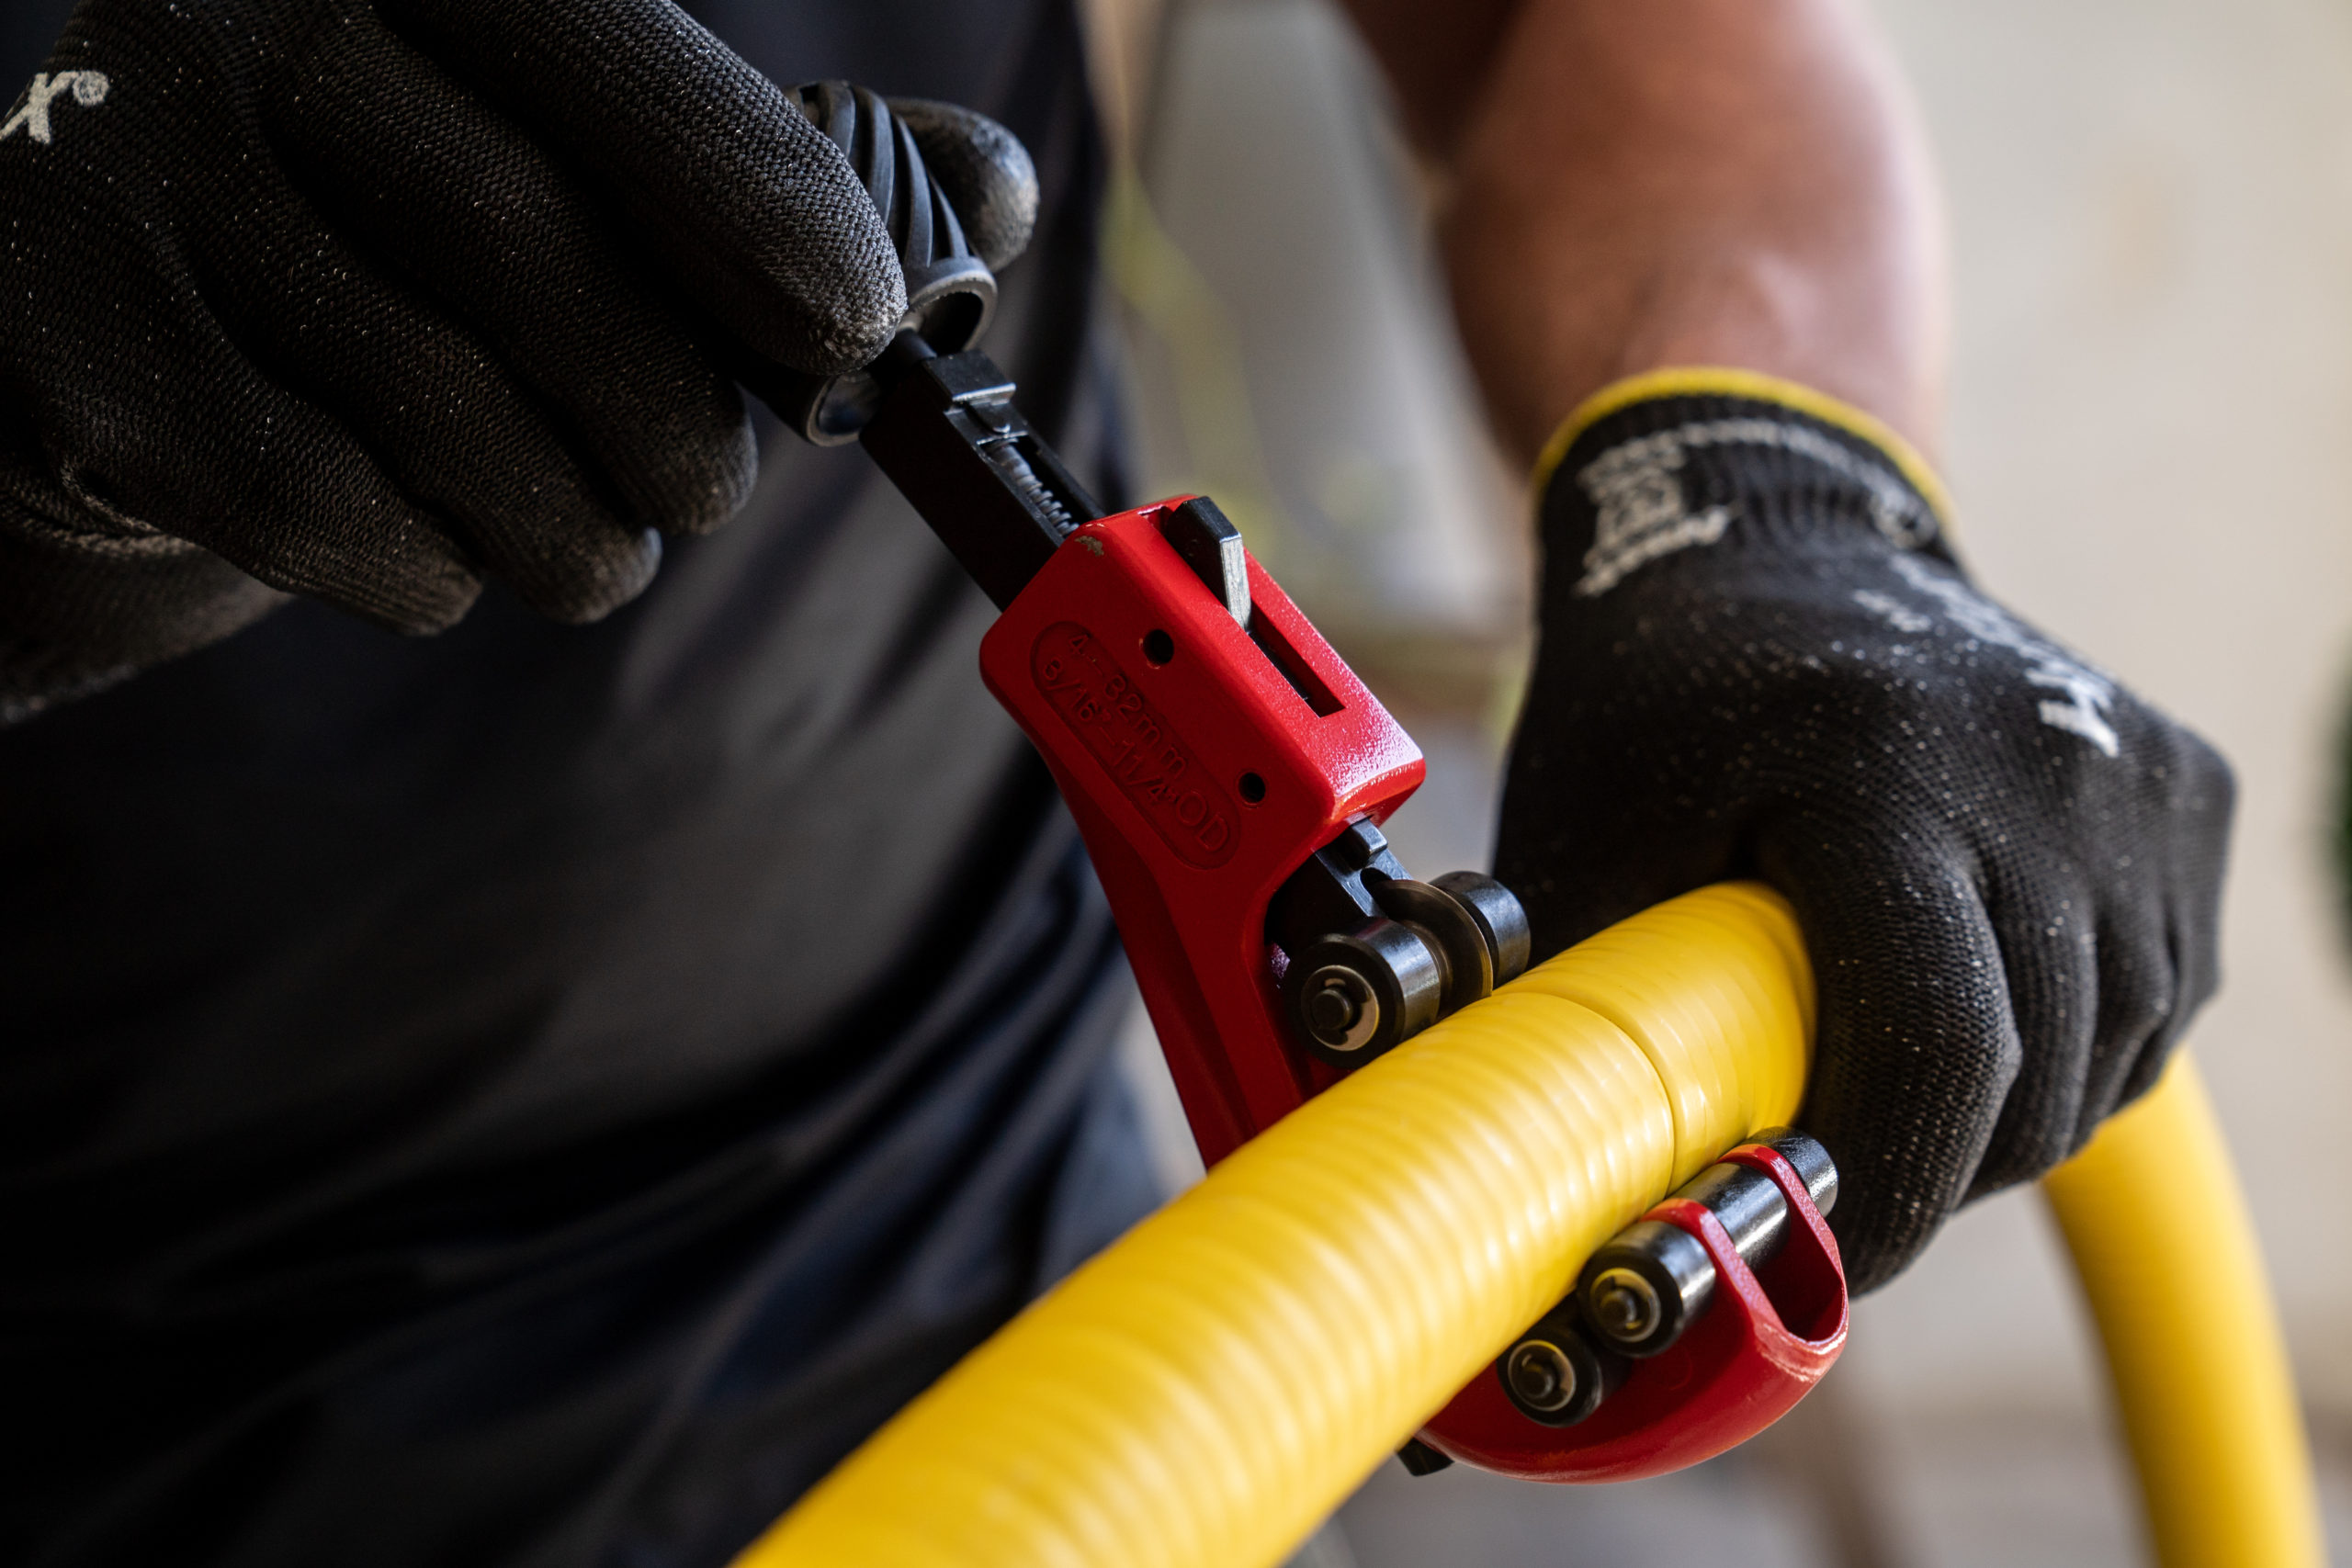
Cut with a wheel metal pipe cutter, centred in the valley between corrugations. Tighten the cutter only slightly each revolution. The cut must be clean, square and circular with no sharp edges.
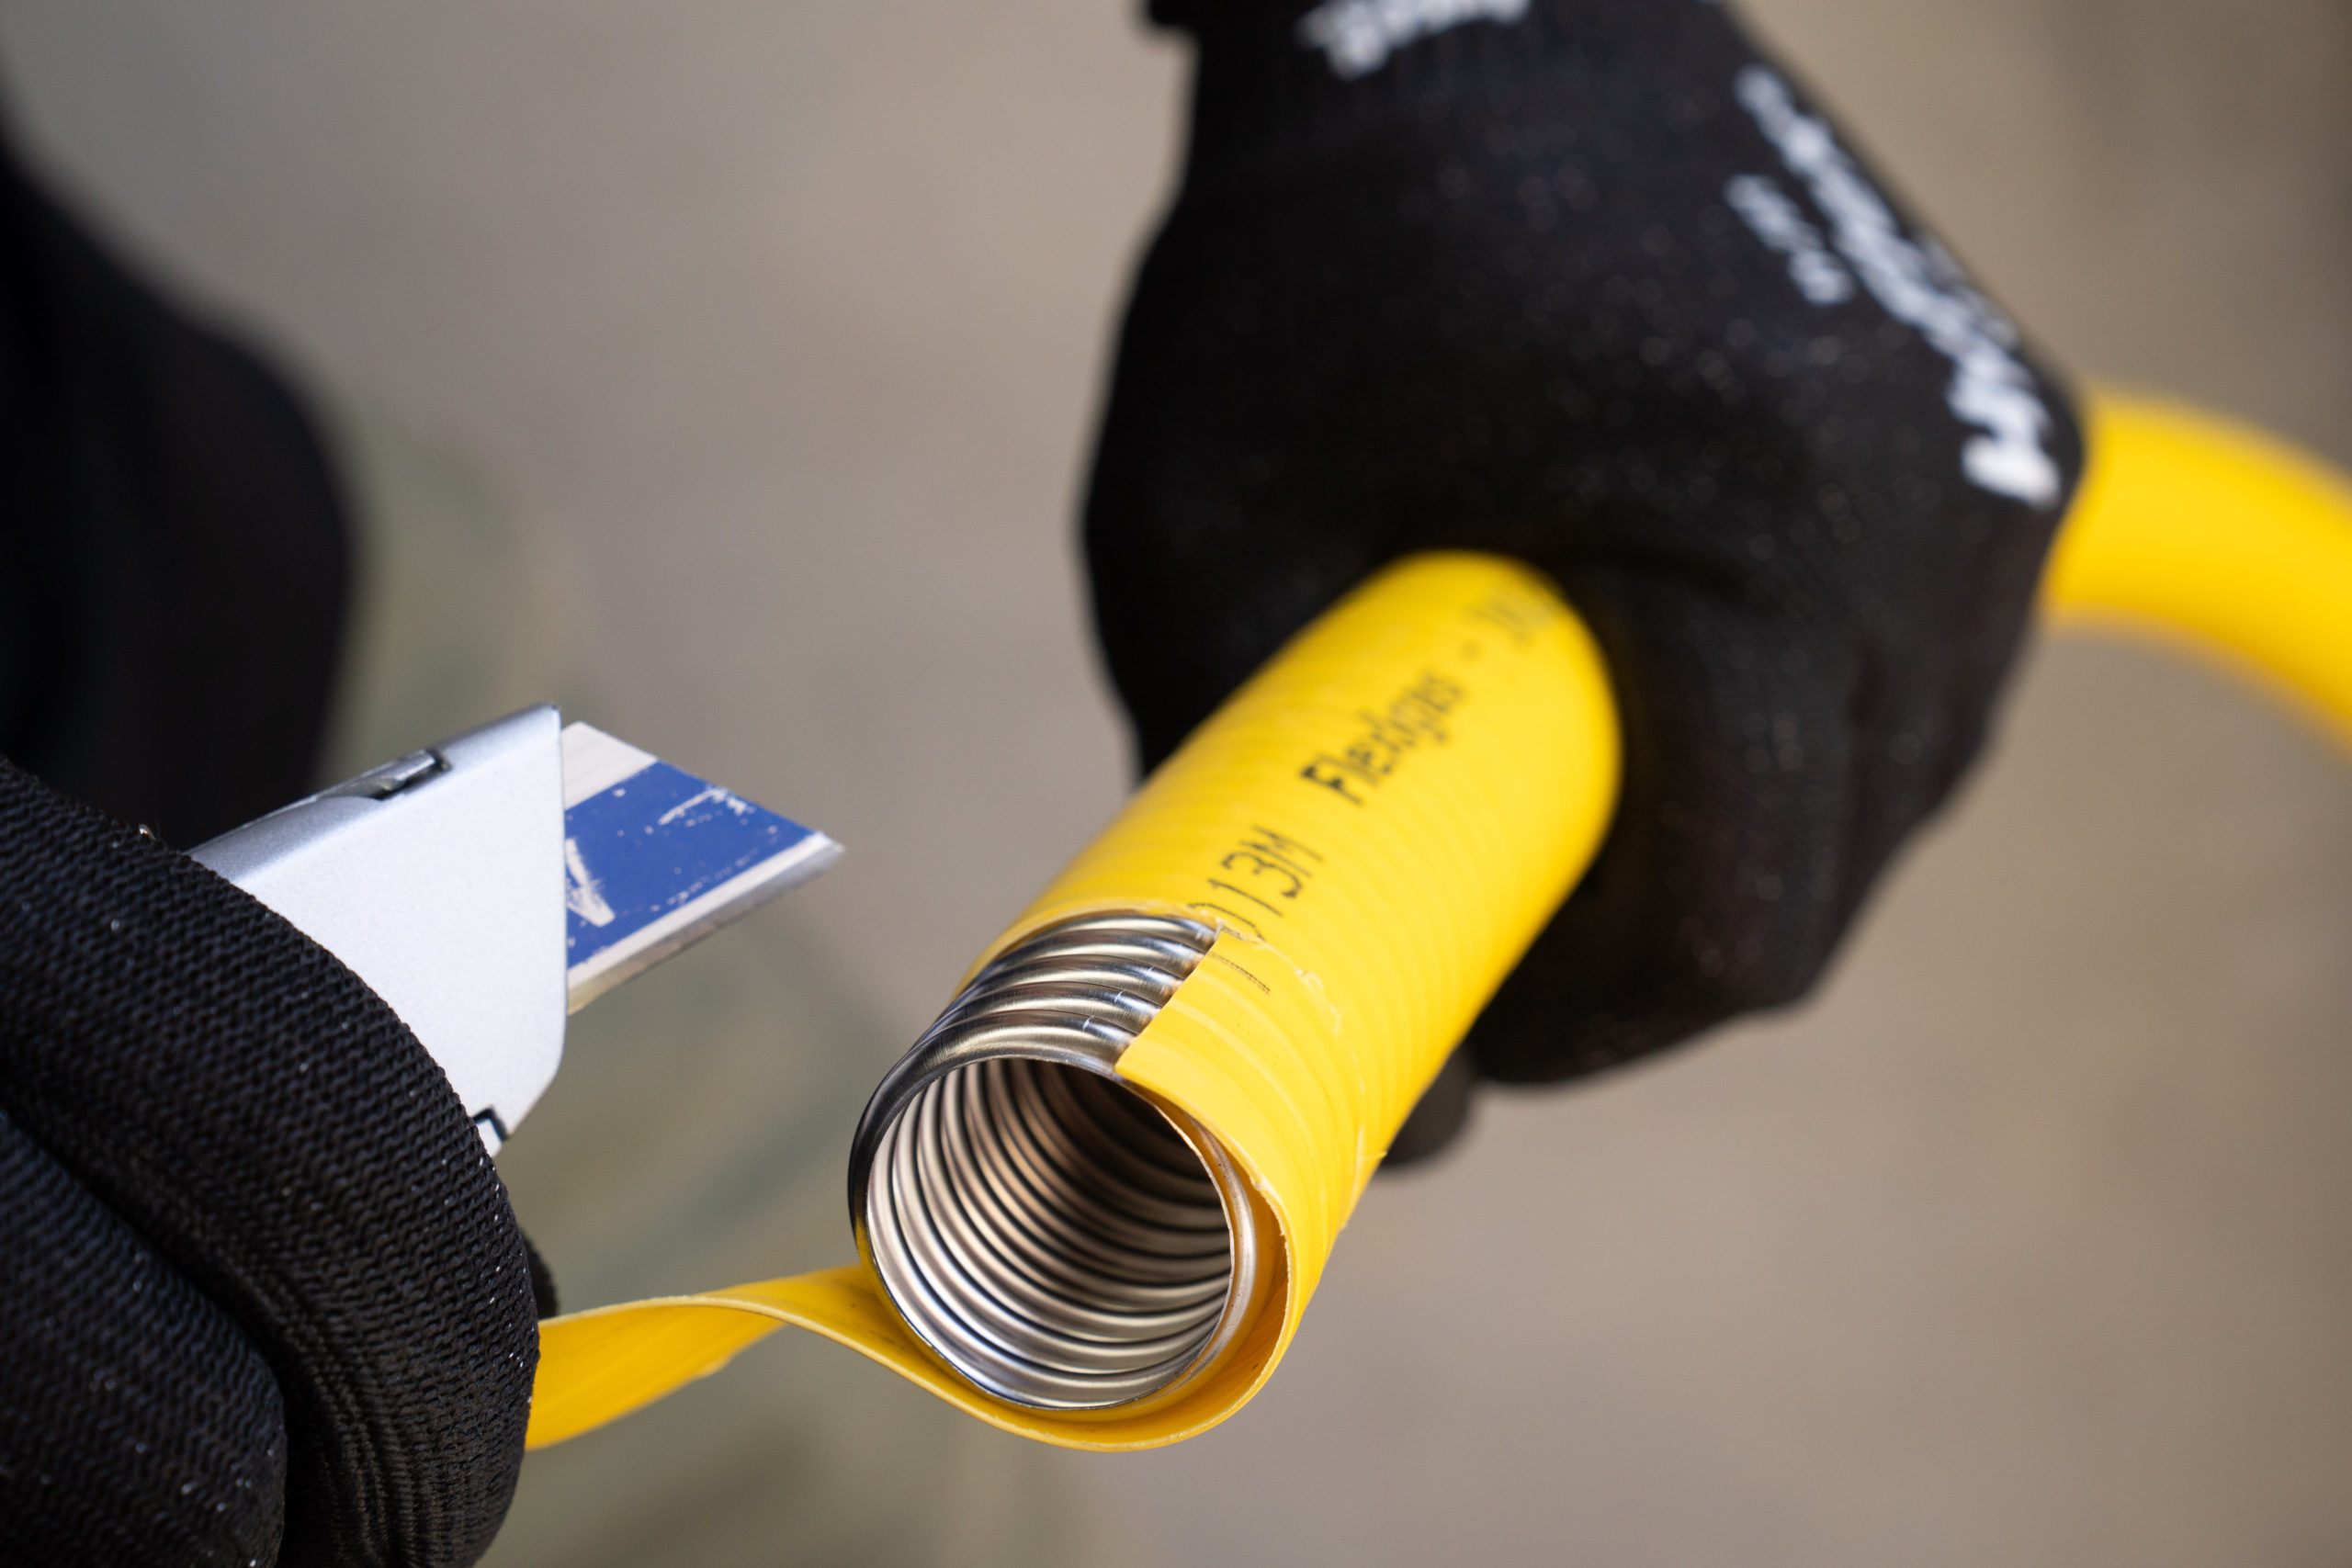
With a utility knife, remove the yellow flame-retardant cover to expose the last four corrugations. No more, no less.
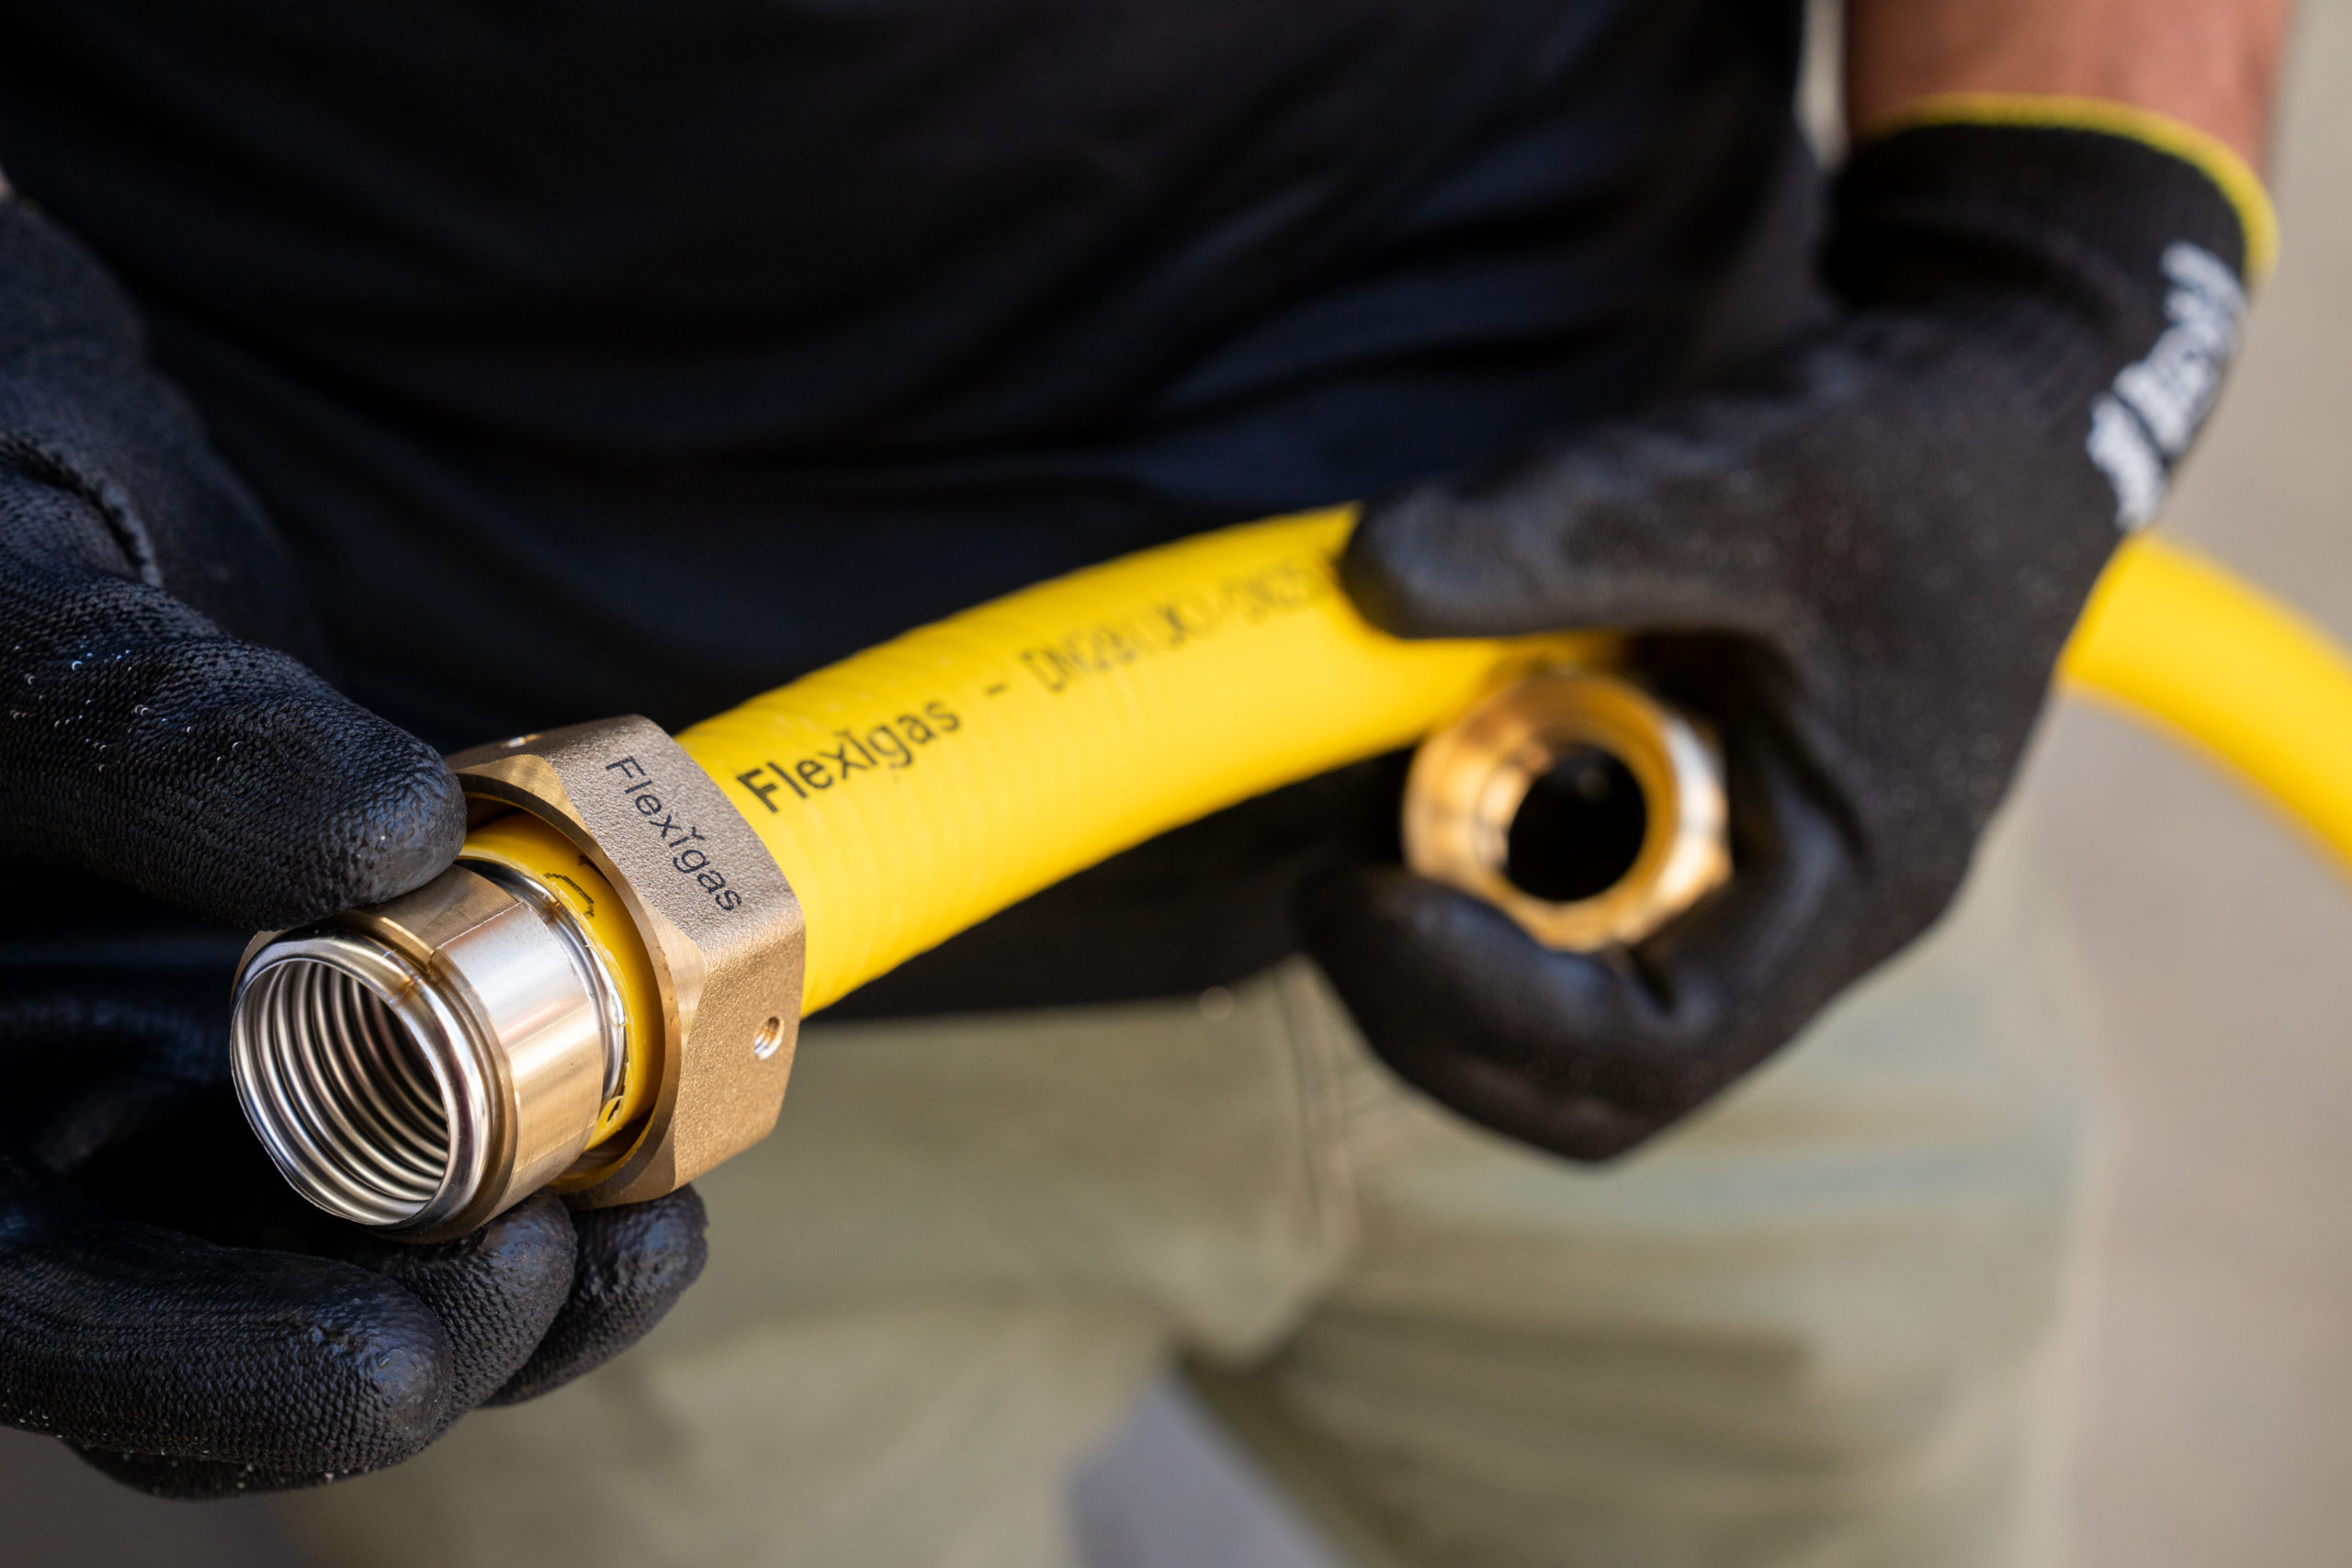
Slide the nut over the tubing, then place the two semi-circular collets so their ridges sit in the last three valleys of the exposed corrugations.
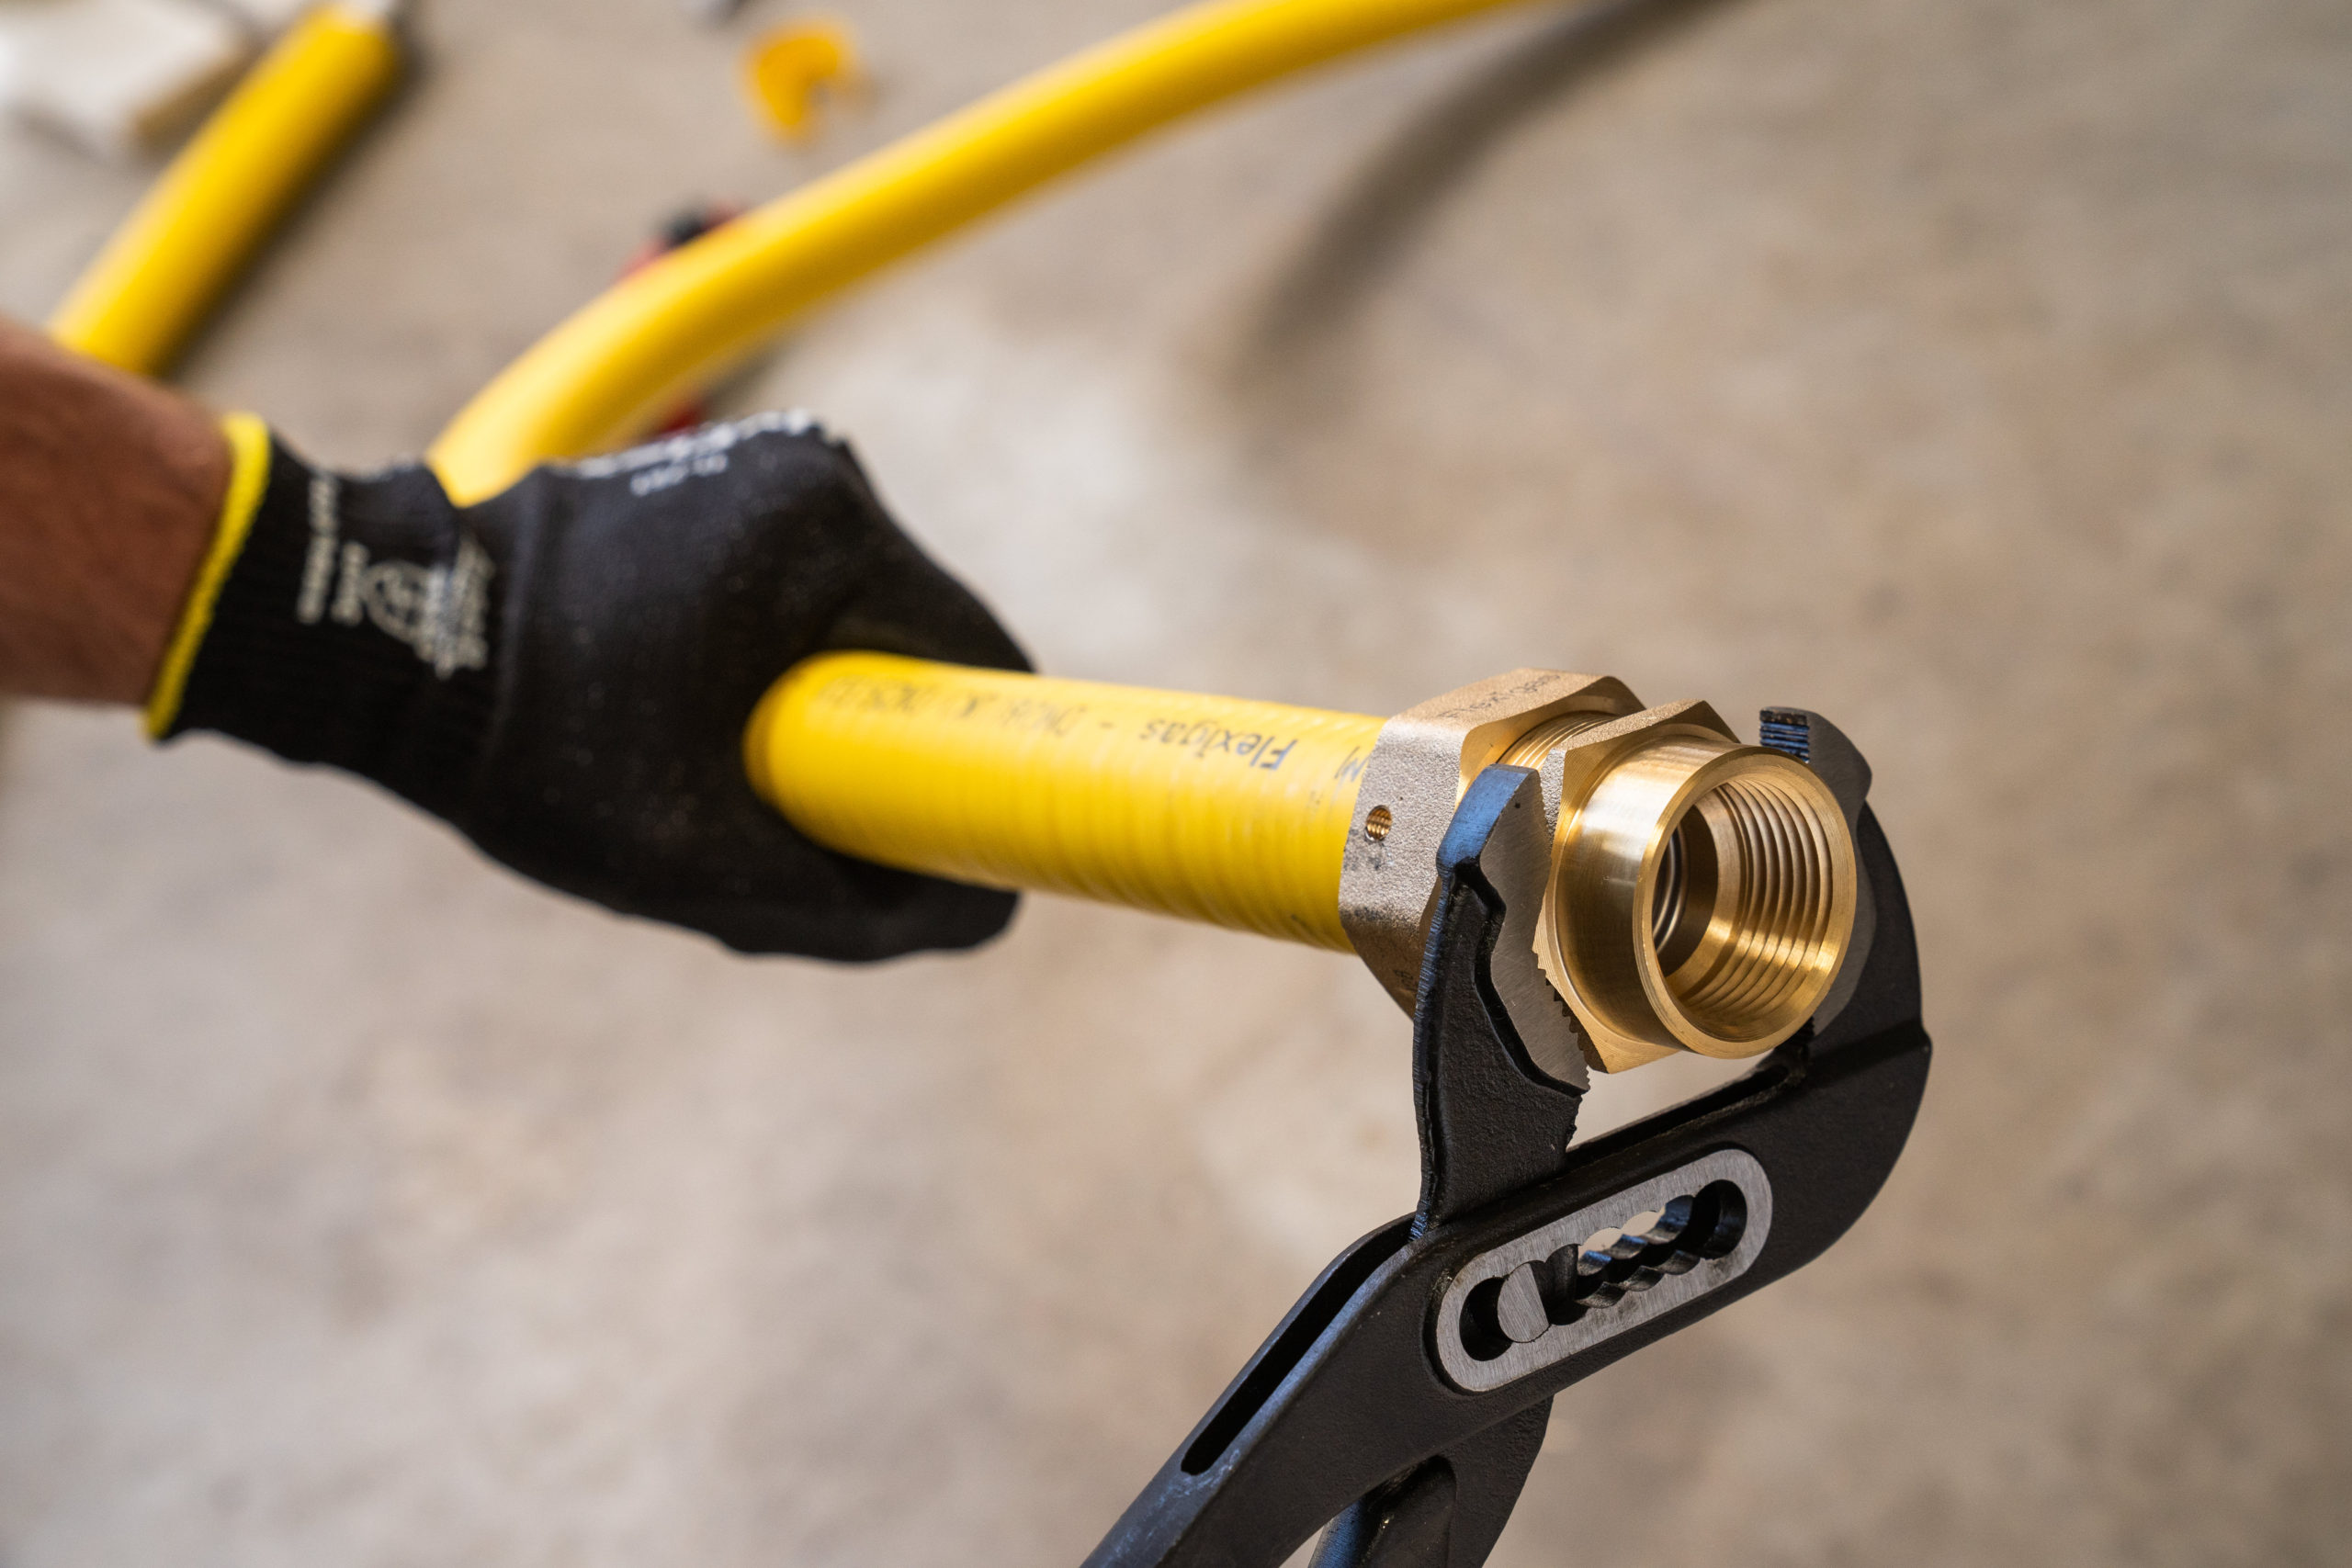
Tighten the nut and fitting with two suitably sized spanners. The seal forms when the last corrugation deforms around the seat inside the fitting. Use sufficient torque.
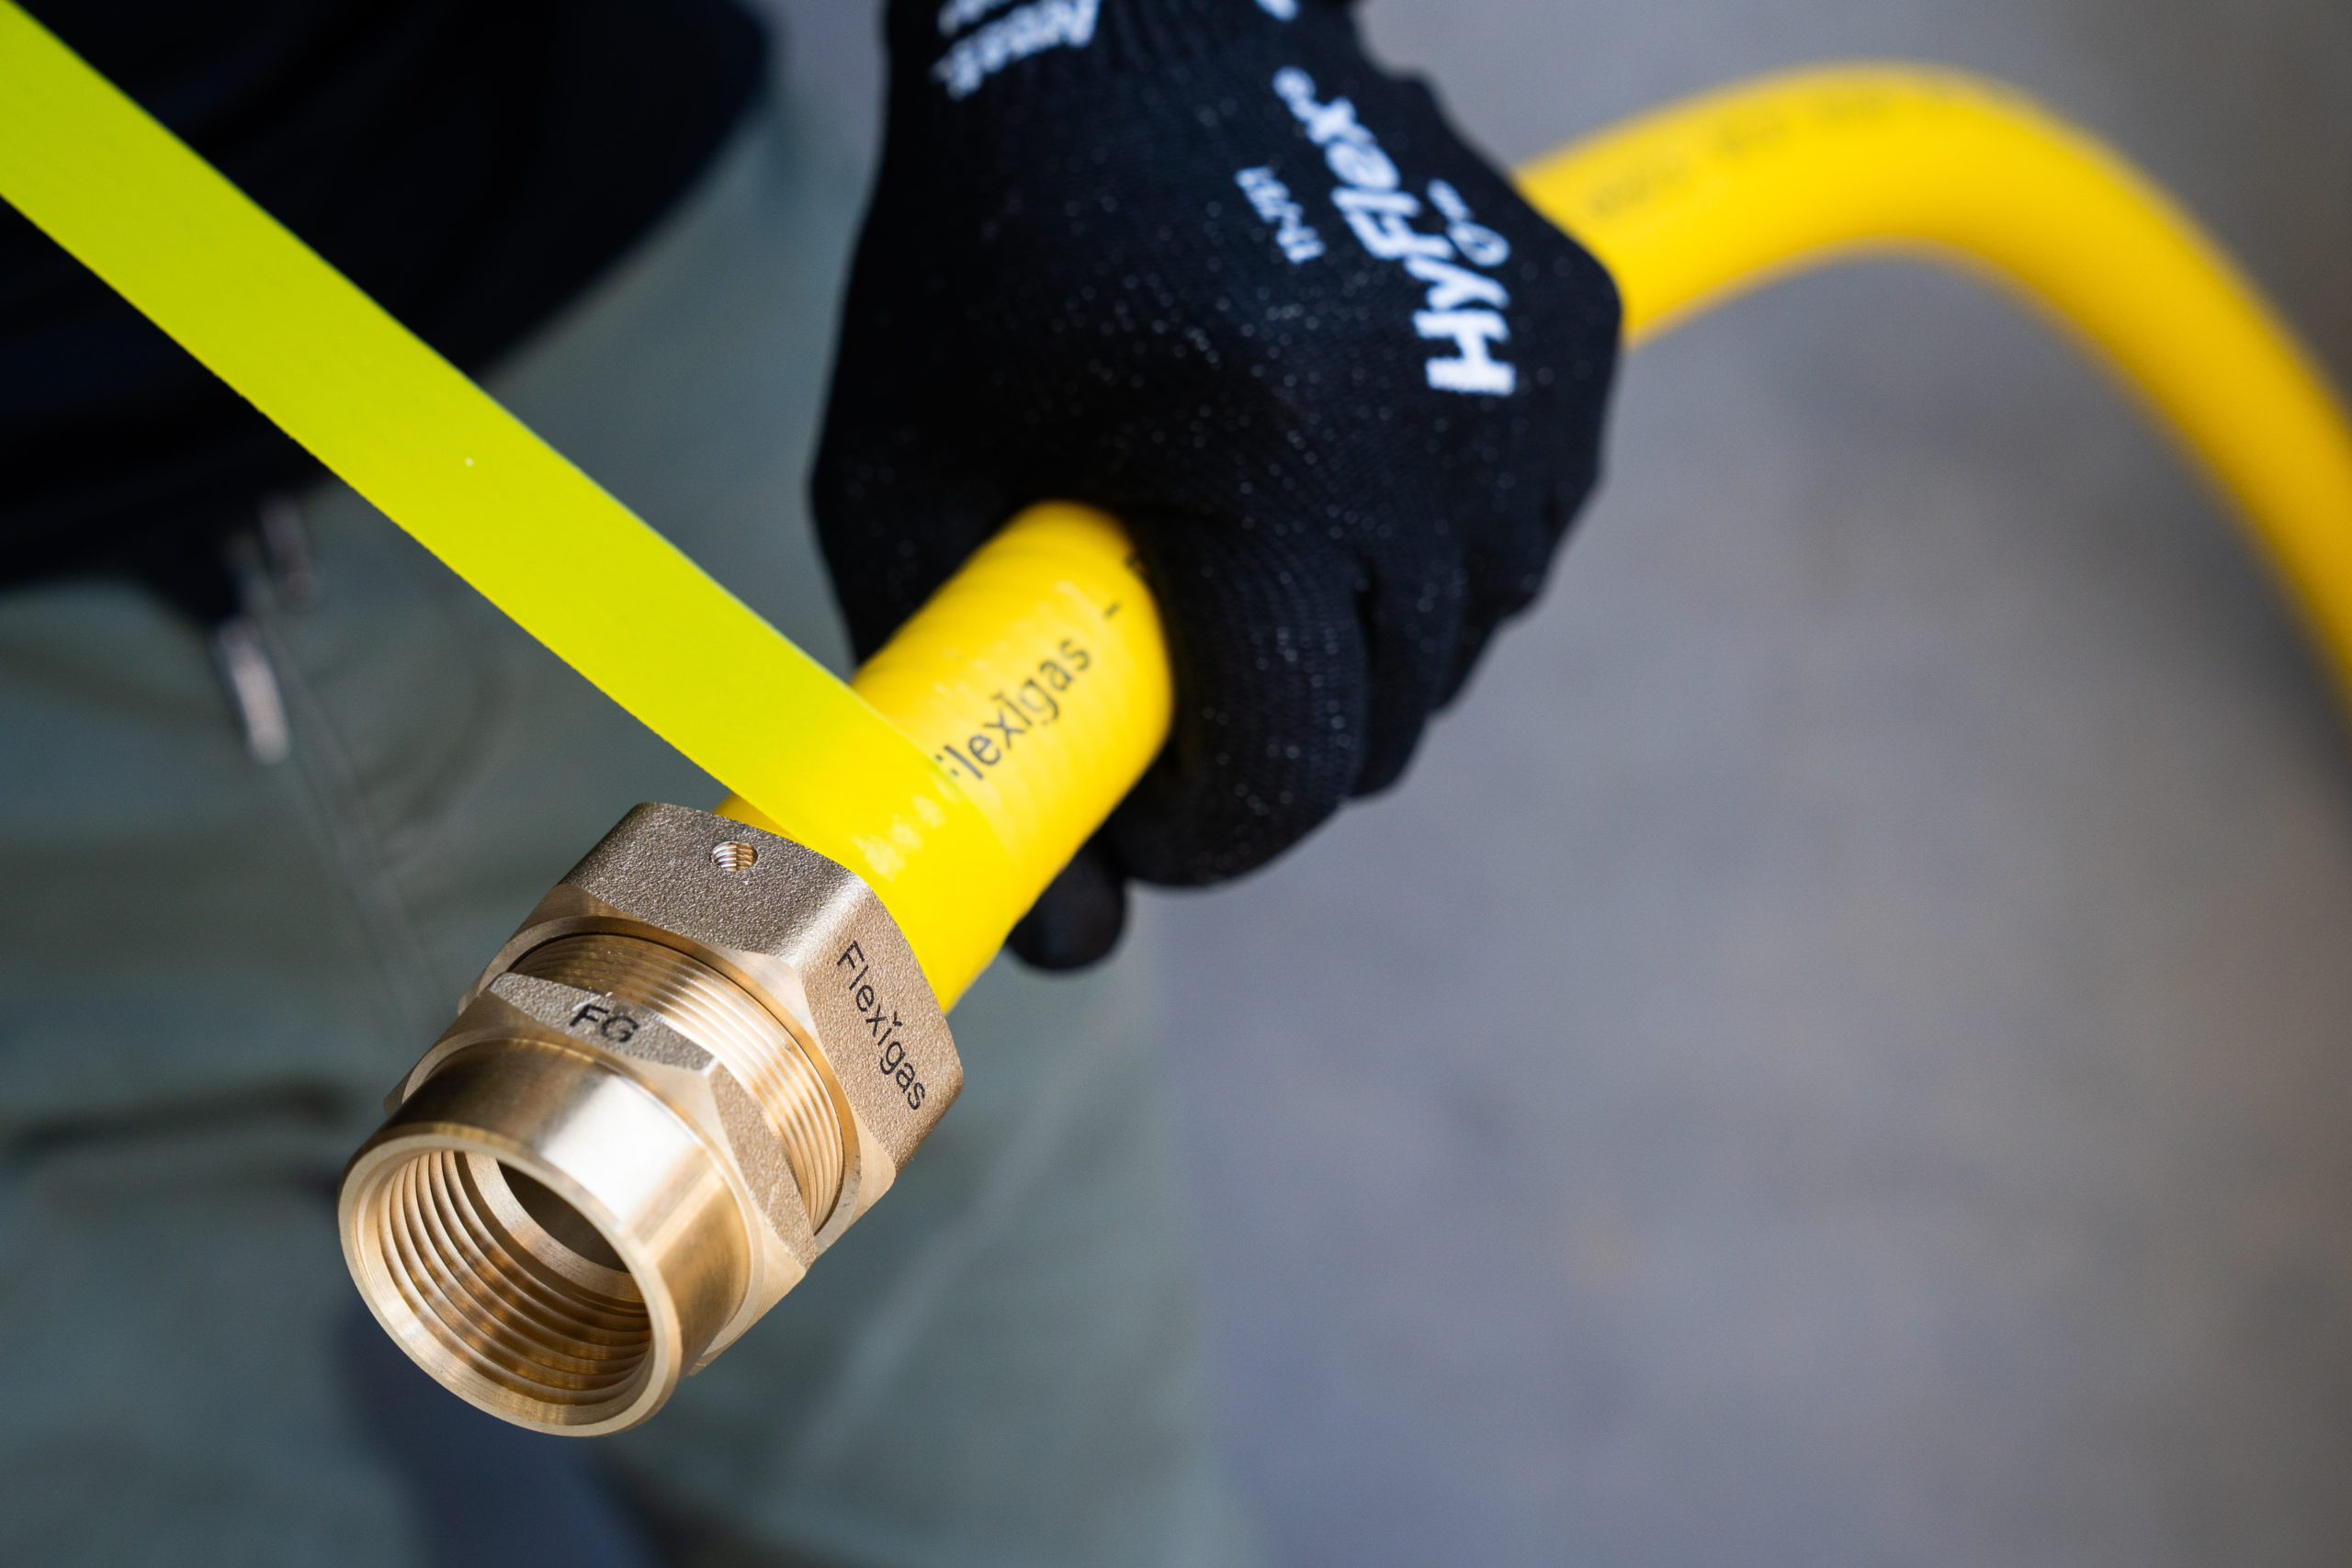
After the gas tightness test has passed, wrap the small gap between the fitting tail and the tube with yellow silicone tape. Test first, so any leak stays visible.
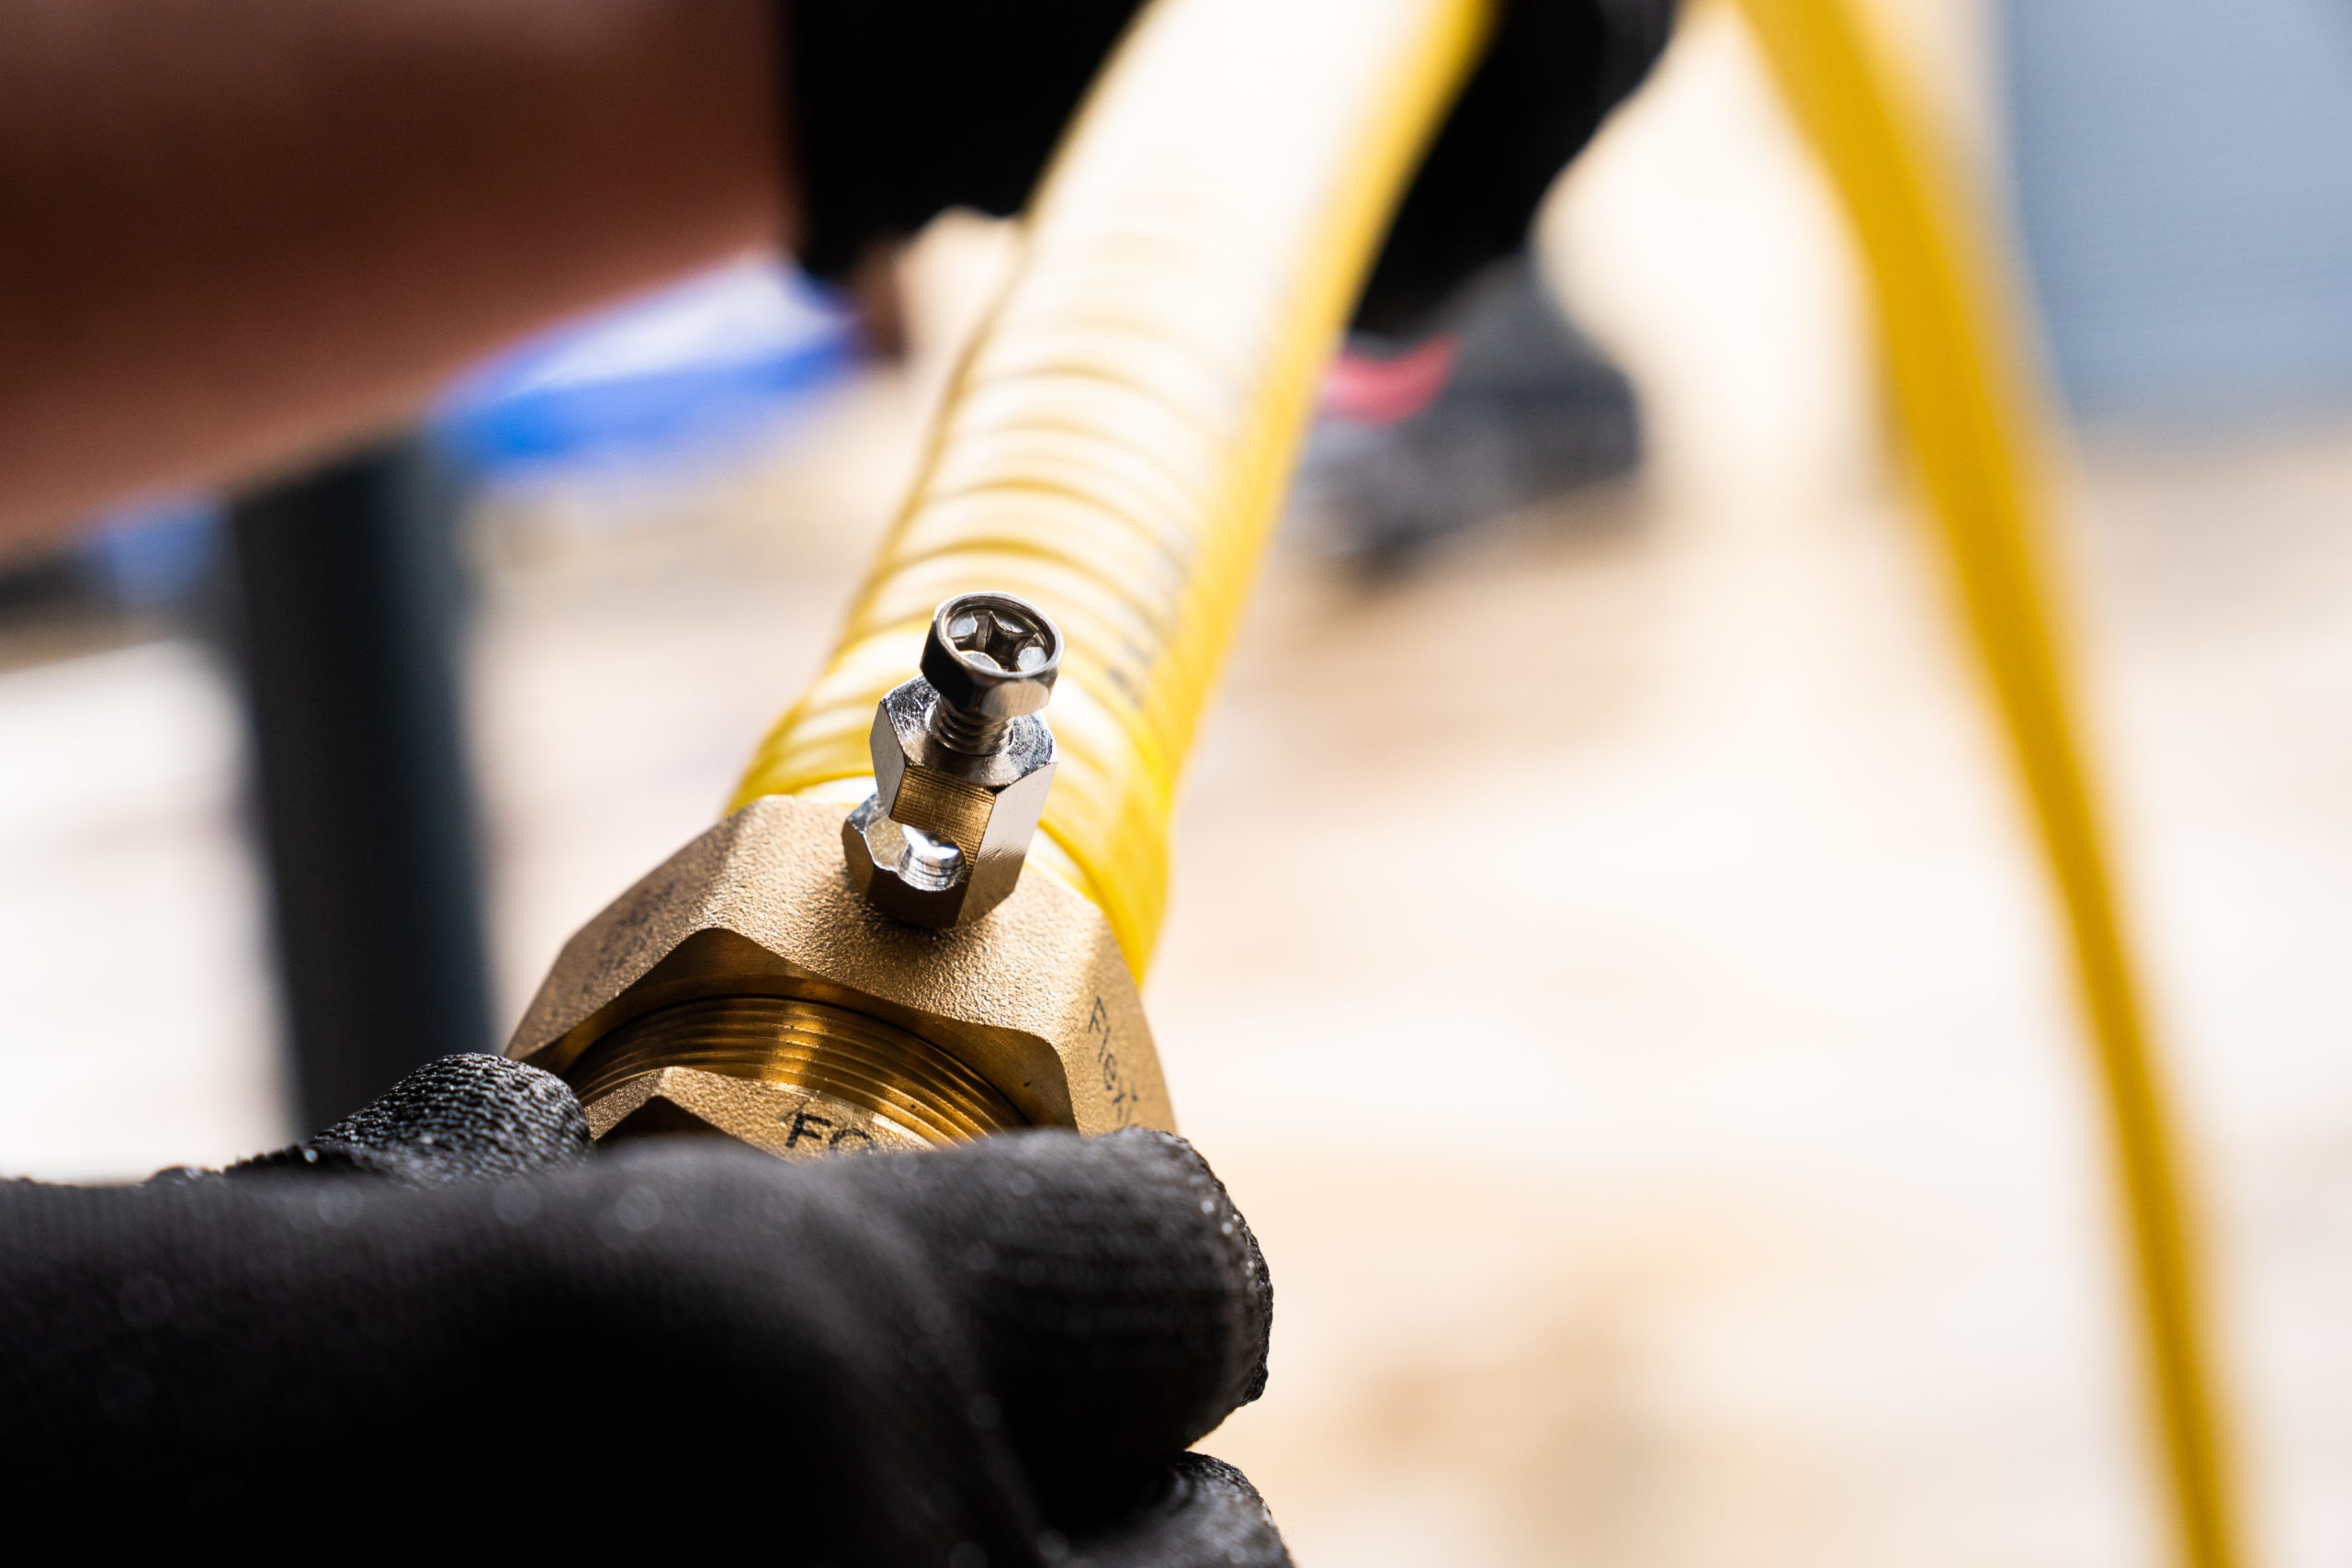
Attach the FG Bond terminal to the fitting body using the pre-drilled holes, with the "Safety electrical connection, do not remove" warning label between the terminal and the nut.
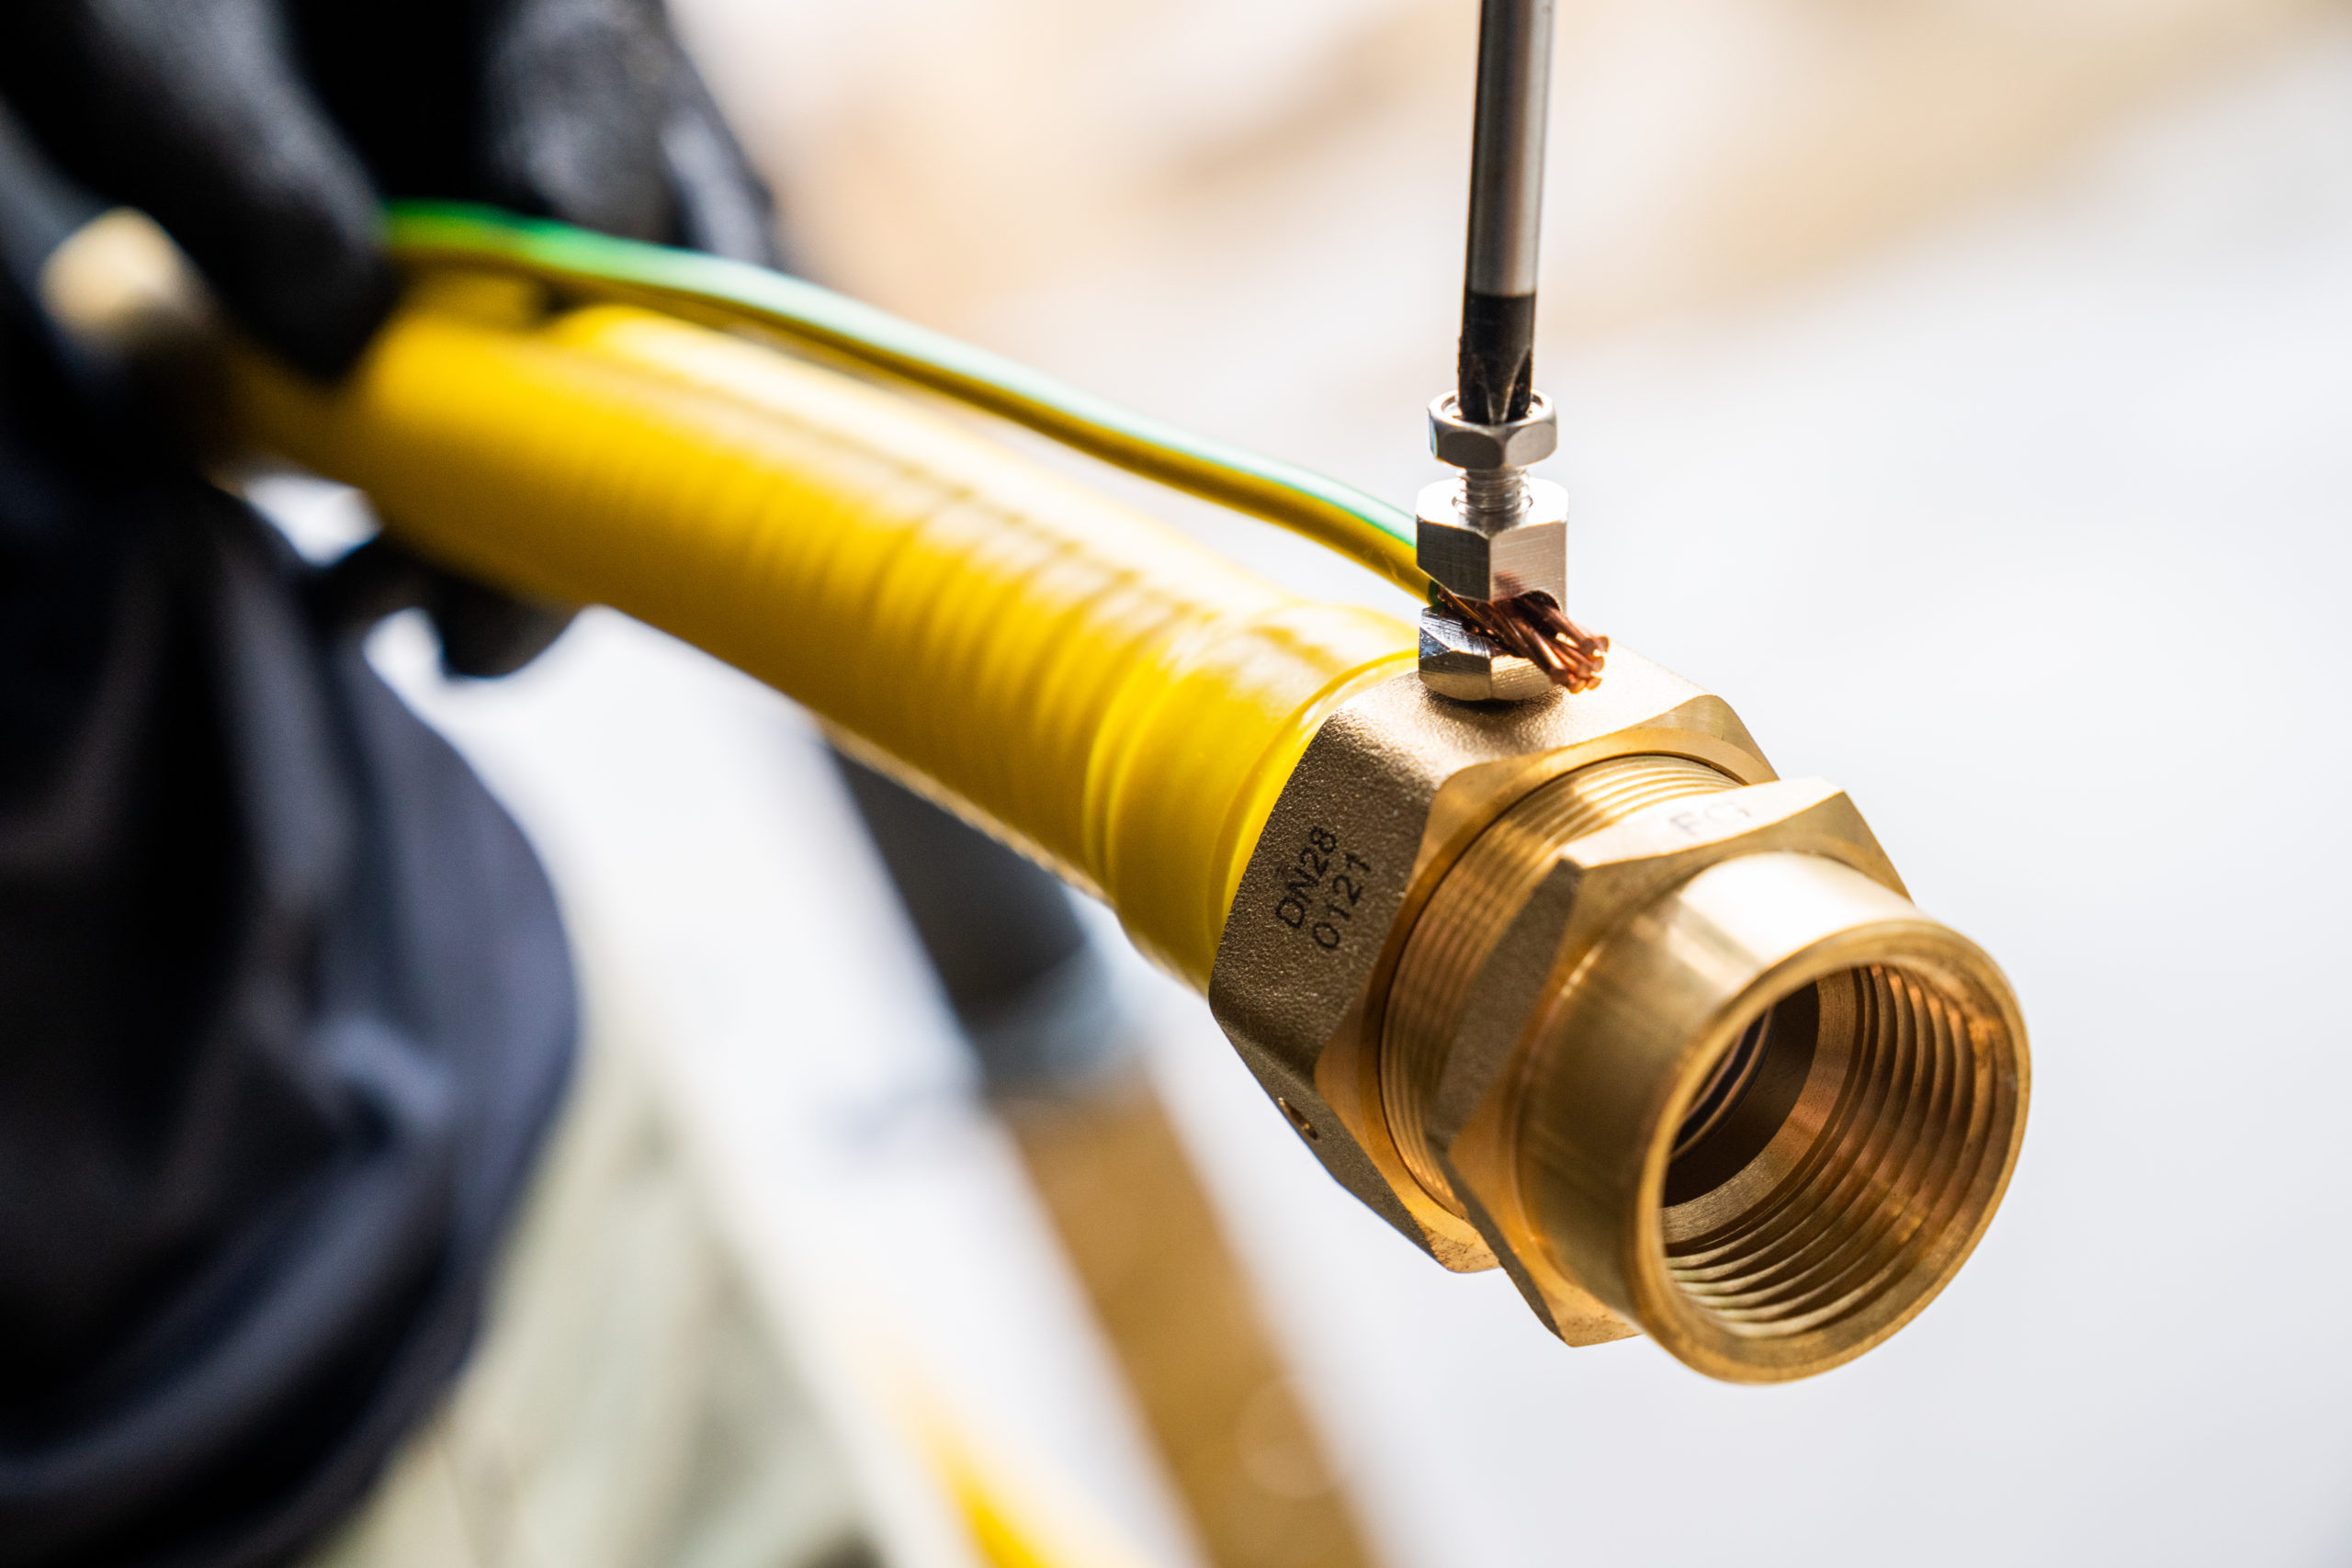
Strip 1 to 2 cm of copper from the earthing cable and screw it down, with the cable running parallel to the tubing. Bonded.
That is the core fitting assembly sequence. The full step-by-step sequence, with every assembly and earth-bonding photo, is in the UK installation guide.
Routing
The flex lets you route around obstacles copper has to be soldered around. The rules still follow BS 6891 and IGEM/UP/2.
Run in the direction of joists or at 90 degrees, never diagonal. Joists under 100mm or over 250mm must not be notched.
Never in a cavity. Within 50mm of the plasterboard face, protect with 1mm steel plate. Sleeve through solid walls.
Minimum 25mm cover in screed. Fittings are never buried, use a conduit junction box. Standard Flexigas needs no extra sleeving.
375mm cover in gardens, 475mm under light traffic, 600mm under heavy traffic. Fittings are never installed below ground.
Bond, test, sign off
Bond per BS 6891 and BS 7671. FG Bond builds the terminal into the fitting, or use a BS 951:2009 clamp on the hex of the fitting, never on the stainless tube.
Gas tightness test per IGE/UP/1B, then purge per IGEM/UP/1A or 1B. Use only non-corrosive leak detection fluid, never chloride-rich soaps.
Wrap the fitting gap and any cover damage with silicone tape only after the tightness test passes, so any leak stays visible during the test.
Standards
Flexigas is installed in accordance with BS 6891:2015 for DN15-DN32 domestic pipework scope, IGEM/UP/2 for DN40/DN50 and work above BS 6891 scope, BS EN 15266:2007 and the Gas Safety (Installation and Use) Regulations 1998. Tightness testing and purging per IGE/UP/1B.
The full step-by-step manual, with assembly and bonding photos, is in technical downloads. Size a run with the gas pipe sizing calculator. All gas work in the UK must be carried out by a Gas Safe registered engineer.
Project support
Talk to the Flexigas technical team about routing, terminations, bonding or testing on a specific job, or find your nearest stockist.