You test a Flexigas installation for gas tightness exactly the way you test any domestic copper job: to IGE/UP/1B, before gas is made available. Make up every termination first. Run the let-by test, then the stabilisation period, then the tightness test, and read the pressure drop against what the installed pipework volume allows. Flexigas operates at a maximum operating pressure of 0.5 bar, so domestic work tests at the usual low-pressure figures. Use only non-corrosive leak detection fluid on the joints, never a chloride-rich soap. The one Flexigas-specific rule that catches people out: wrap the silicone tape around the fitting tail AFTER the tightness test passes, never before, so a leak at the tail stays visible while you test. Purge to BS 6891 once the test is signed off.
A practical testing reference for Gas Safe registered engineers commissioning Flexigas Corrugated Stainless Steel Tubing on domestic and light-commercial gas work. No marketing copy. Just what you need to get the test right first time.
1. Test it the way you test copper
Gas tightness testing on a Flexigas installation is not a special procedure. The seal is mechanical rather than soldered, but once the pipework is made up it is just pipework holding gas, tested to the same standard as any other domestic install. The Flexigas Installation Manual is explicit: upon completion and prior to gas being made available, the system shall be tested for gas tightness and purged in accordance with IGE/UP/1B (tightness testing and purging of domestic-sized natural gas installations), or other applicable standard.
IGE/UP/1B sits in the wider IGEM/UP/1 family: IGE/UP/1B for domestic-sized natural gas, IGEM/UP/1A for larger domestic and small commercial, and IGEM/UP/1 for industrial and commercial installations. For most Flexigas work on a house, IGE/UP/1B is the one you follow, and almost everything you already do carries over. What follows is the order of operations, the Flexigas-specific tape rule, and the numbers you need.
2. Pressure context: MOP 0.5 bar
The maximum operating pressure for Flexigas is 0.5 bar, per BS EN 15266:2007 and BS 6891. That is the rated ceiling for the system, the pressure it is Kitemarked to (KM 598726), and it is never exceeded. It does not change how you test a normal domestic natural gas job, which runs at low pressure with a meter regulator delivering around 21mbar (BS 6891). Your tightness test pressure comes from IGE/UP/1B and the meter arrangement, not from the 0.5 bar figure. On third-family gas (LPG) the supply regulates differently and the permitted drop figures change; follow the LPG-specific standard for those installs.
3. The order of operations
Get the sequence right and the rest is reading a gauge. The critical thing on a Flexigas job is that the tape goes on last, so build the test in before you tape.
- Make up every termination with the dry mechanical seal (no jointing paste, no PTFE on the seal).
- Inspect the cover for gaps or holes and note where repairs are needed, but do not tape them yet.
- Run the let-by test, then the stabilisation period, then the tightness test per IGE/UP/1B (detailed below).
- Only once the test passes, wrap silicone tape around the gap at each fitting tail and over any cover gaps you found, at minimum 50% overlap for a double-thickness layer.
- Purge per IGEM/UP/1A or 1B to BS 6891.
4. The let-by test, then the tightness test
IGE/UP/1B is a two-part procedure and the order is not optional.
Let-by test first
The let-by test confirms the emergency control valve (ECV) is holding and not passing gas into the section you are about to test. If the ECV lets by, you cannot get a reliable tightness reading, because the gauge is being fed from upstream. Sort the let-by before you go any further. This is exactly the let-by step you run on a copper install; nothing about Flexigas changes it.
Stabilisation period
Before you take the tightness reading, the test medium needs to settle. Pressurise to the test pressure, then leave it for the stabilisation period set out in IGE/UP/1B so temperature and pressure equalise across the pipework. Reading the gauge too early gives a false result driven by the gas still settling, not by a real leak. Wait the stabilisation period out, then start the timed test.
Tightness test
With let-by confirmed and the system stabilised, run the timed tightness test. Hold the test pressure for the test period and read the pressure drop on the gauge. A pass is a drop within the permitted figure for that installation. Anything more sends you to your leak detection fluid (Section 6) to find the joint.
5. The permitted drop depends on the installed volume
This is the part people get wrong. The permitted pressure drop in a tightness test is not a single fixed number. It depends on the internal volume of the installation. A small volume shows the same physical leak as a larger pressure drop, so the permitted drop is tighter; a larger volume absorbs the same leak, so the permitted figure is read accordingly from IGE/UP/1B.
That means you need the installed pipework volume before you can judge the test. The Flexigas Installation Manual gives the internal volume per metre for each size so you can work it out:
Flexigas internal volume per metre
| Size | m³ per 1m length |
|---|---|
| DN 15 | 0.00020 |
| DN 22 | 0.00043 |
| DN 28 | 0.00068 |
| DN 32 | 0.00098 |
| DN 40 | 0.00162 |
| DN 50 | 0.00236 |
Multiply the metres of each size by its figure and add them up, then add the volume of any copper, the meter and any appliance connections in the test section. That total is your installation volume.
Worked example
A job running 8m of DN22 and 4m of DN15 in Flexigas:
- DN22: 8m × 0.00043 = 0.00344 m³
- DN15: 4m × 0.00020 = 0.00080 m³
- Flexigas subtotal = 0.00424 m³
Add the meter and any copper, then take that total to IGE/UP/1B for the permitted drop. You cannot judge a pass or fail without first knowing the volume, and the table above is how you get the Flexigas part of it.
6. Leak detection fluid: non-corrosive only
If the test fails, you go looking for the joint with leak detection fluid. On a stainless steel and brass system this matters more than on copper. The Installation Manual is explicit: some leak detection fluids may be corrosive to the components of Flexigas (the 316L stainless steel and the CW602N brass) and should not be used. In particular, chemicals with a high chloride content (such as soaps) should be strictly avoided. Washing-up liquid is the classic offender; chloride sitting on stainless steel starts pitting corrosion over time, exactly where you do not want it, on a gas joint.
Use only a non-corrosive leak detection fluid suitable for stainless steel. Apply it to the joints, watch for bubbles, find the leak, remake the joint, and re-test. Because you have not taped yet (Section 7), the leak shows at the tail where you can see it rather than hidden under a wrap.
Where to test from
Take the reading from a pressure test point no more than 300mm downstream of any AECV (Additional Emergency Control Valve).
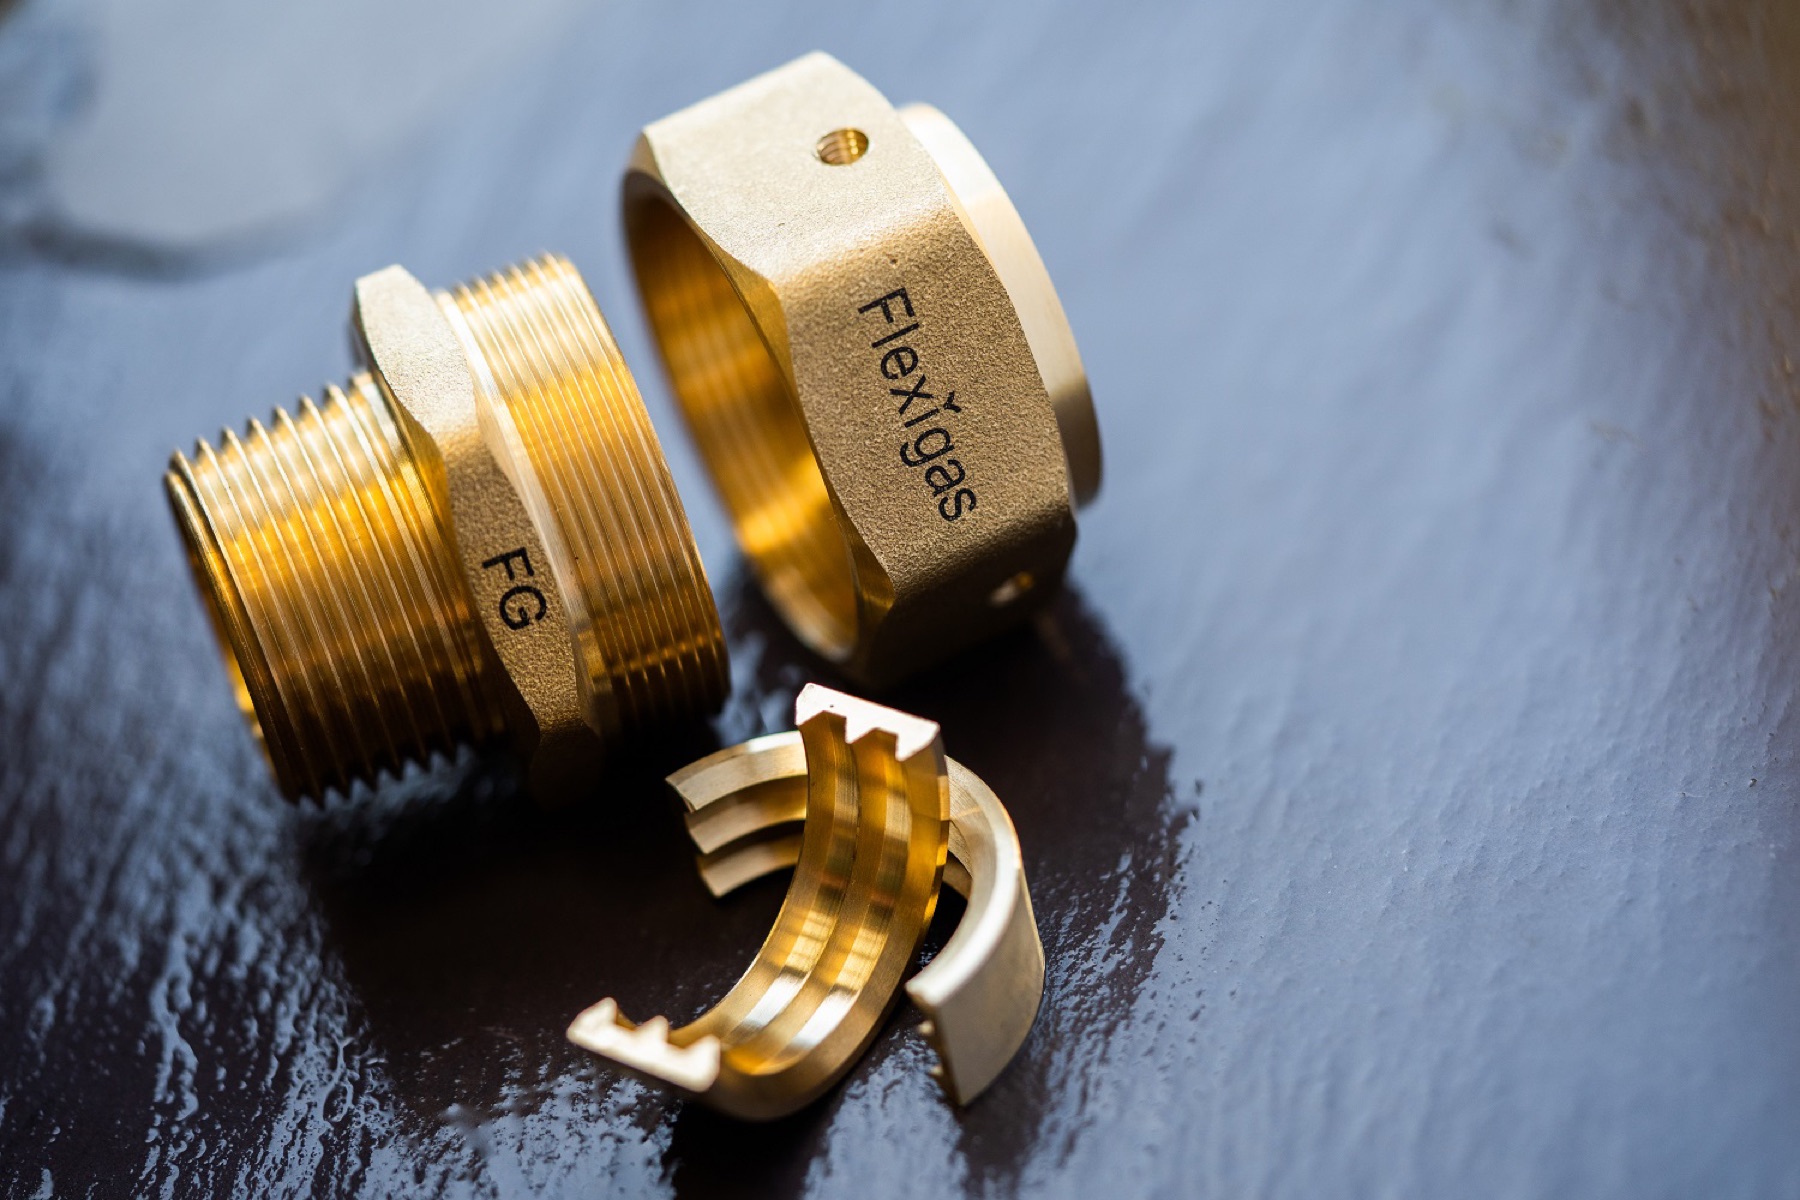
7. The critical Flexigas rule: tape after the test, never before
This is the one rule that is specific to Flexigas and the one that costs a re-test if you get it wrong.
The Manual states it plainly: self-bonding silicone tape should only be applied to any gaps or holes on the cover, and to the area around the fittings, after the gas tightness testing has been conducted.
The reason is leak visibility. The small gap between the fitting tail and the tube is exactly where a marginal seal will weep. Tape that gap before you test and you have wrapped over the one place a leak would show, which can mask a slow weep long enough to pass a test it should have failed. Test first, tail bare, so any leak is visible to the eye and to the leak detection fluid. Only when the test passes do you wrap the tail and the cover repairs, at minimum 50% overlap for a double-thickness layer, to protect the exposed stainless steel from chloride attack in service.
So the sequence is always: make up, test, then tape. Never make up, tape, then test.
8. Purging to BS 6891
Once the test passes and the joints are taped, purge before the appliance goes into service. Whenever a gas supply system is commissioned or re-commissioned it must be purged per IGEM/UP/1A or 1B, which includes a tightness test as above, all within the BS 6891 framework for domestic work.
Purge through the appliance where you can. Where that is not possible, provide an appropriately sized purge point per the standard, then commission and leave the installation safe.